Polysmith integration
The Polysmith-Somnoware workflow gives you control and visibility when you upload and manage sleep studies. You can choose one of the following setups:
Centralized SDI (or server SDI): SDI is run centrally on the Polysmith DMS server (no local SDI installs on workstations).
Local SDI: SDI is installed on each technician and scorer workstation.
Important
If you migrate from centralized SDI to local SDI, do not run both setups at the same time.
The following information relates to the local SDI setup.
Enable the Polysmith integration workflow and control how tech notes and previews work during sleep study uploads. Use this setup if the SDI runs locally.
Note
Typically, the Resmed support team does the configuration.
Go to Configuration > Facilities.
Hover over the facility and click the Edit icon.
From the Features tab, go to Custom Sleepware Settings > Polysmith.
Click Edit.
Turn on Enable Server Scoring Workflow.
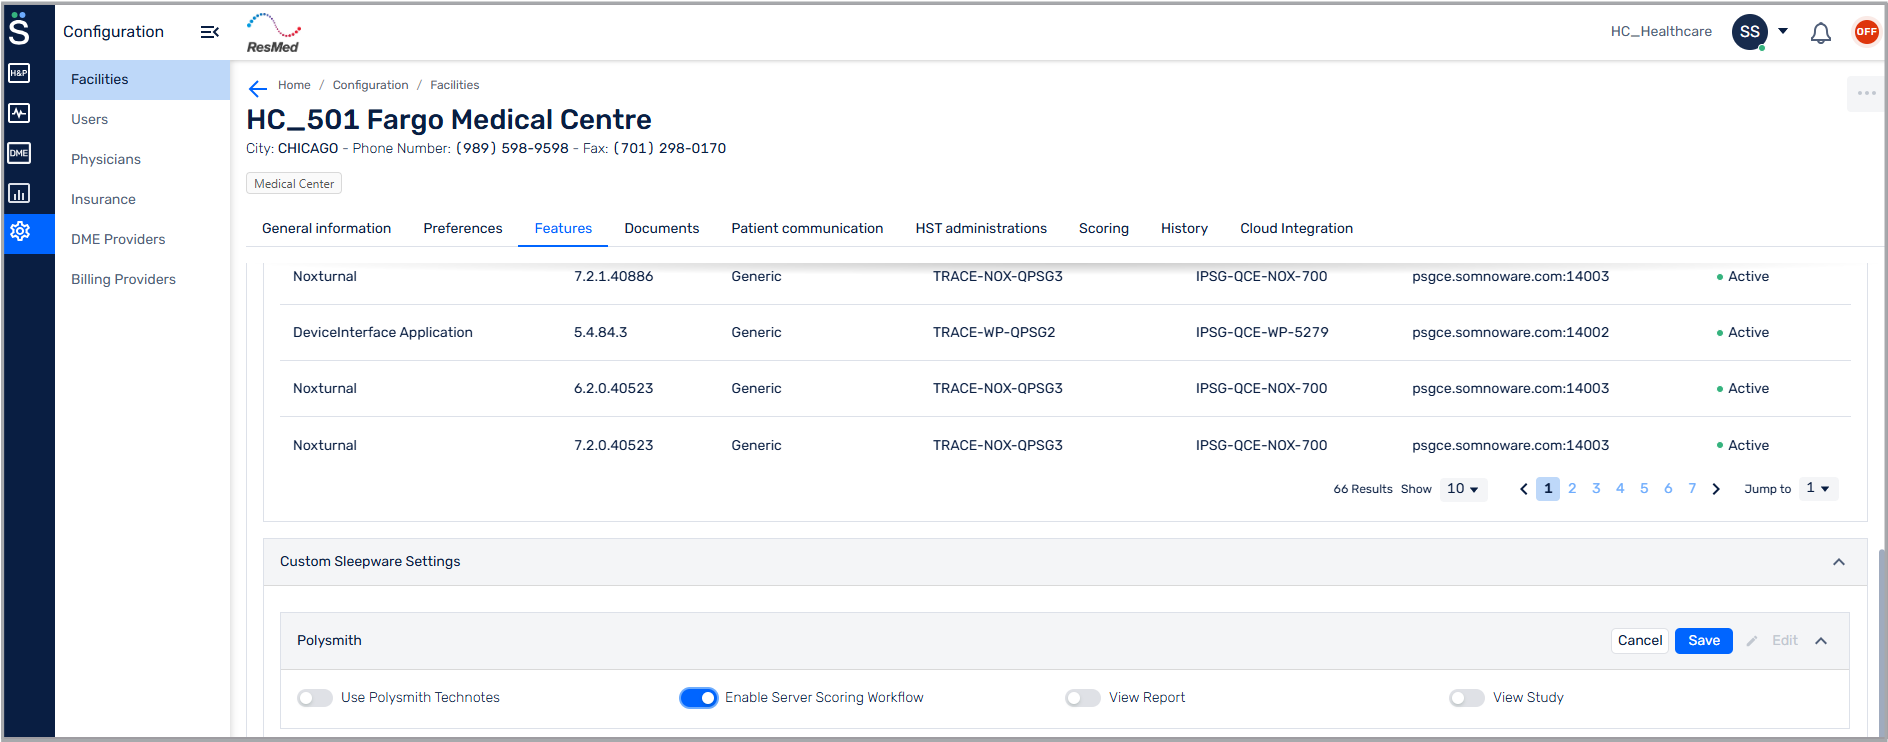
Select the appropriate options:
Use Polysmith Technotes: Enable to use Polysmith tech notes. If turned off, Somnoware tech notes are used.
View Report: Enable to view the report preview while uploading studies.
View Study: Enable to view the study preview while uploading studies.
Click Save.
Install SDI on all technician and scorer workstations.
Note
Typically, the Resmed support team does the configuration.
Sign in to Somnoware.
Right-click the SDI system tray icon and select Settings.
Go to one of these tabs:
Technician computers: Go to the AST tab, and in the AST Sleepware Settings section, select the facility and bed.
Scorer computers: Go to the Scorer tab.
Click Add AST sleepware.
From the Device type list, select Polysmith and click Save.
Expand Polysmith and enable Default Sleepware.
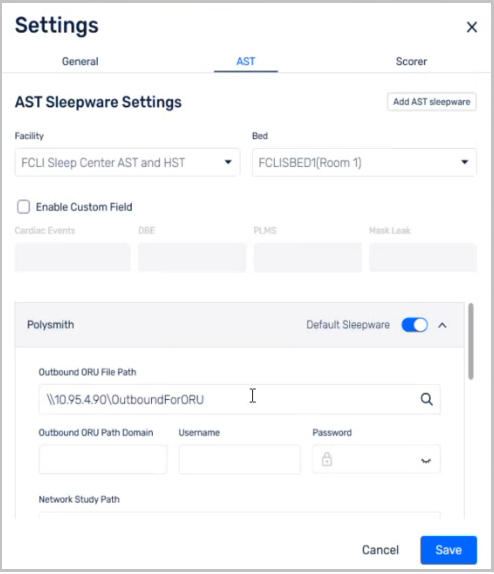
In SDI, set these paths to match your Polysmith configuration:
Outbound ORU File Path: The directory where SDI looks for ORU notification files from Polysmith. Ensure this path matches the Polysmith configuration in:
Polysmith DMS > Management > EMR Settings > HL7 Results Message Settings
Outbound ORU Path Domain, Username and Password: The network credentials, if the Outbound ORU File Path is a network location.
Network Study Path: The directory where Polysmith's auto copy service moves completed studies. Do not use the study recording path. Ensure this path matches the Polysmith configuration located here:
Go to Polysmith installation folder > run
CopySvcCfg.exe> click Settings, and view Destination field.Network Study Path Domain, Username and Password: The network credentials if the Network Study Path is a network location.
Report Template Path: The directory where Somnoware merged templates are located. SDI requires report templates to upload studies to Somnoware cloud. Enter a path where a copy of the Somnoware merged report templates is stored.
Report Template Path Domain, Username and Password: The network credentials if the Report Template Path is a network location.
Polysmith installation path: The directory where the Polysmith application is installed.
Click Save.
Close the Settings window and restart the SDI instance.
Start a Polysmith study from Somnoware and complete the upload when the study ends.
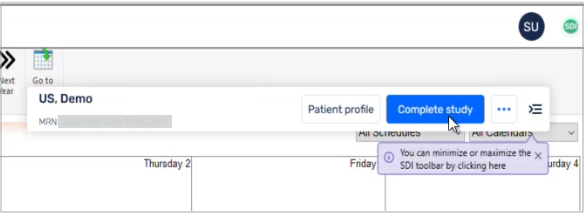
Go to Scheduler > AST, and click the patient's appointment in the calendar.
Click Start Study, and when prompted, click Yes to launch Polysmith.
In the Clinical Information window, make any changes and click Next.
To open Polysmith DMS, click OK.
Click the patient in the Polysmith DMS calendar, and click Start PSG.
To add tech notes during the study, see ???.
Note
If you enabled Use Polysmith Technotes, the SDI toolbar does not display the Tech notes button. For more information, see Configure the centralized SDI setup in Somnoware.
When the study is complete, in Polysmith, click Record > Yes.
In the SDI toolbar, click Complete study.
If the study requires scoring, in the Complete study window, from the Scoring status list, select Upload study for scoring.
If the study is scored:
In Polysmith, go to Reports > Send to EMR, and click Yes to generate the report.
In the Complete study window, from the Scoring status list, select Scoring complete (upload study to physician for interpretation).
From the Matching Acquisitions for this patient section, select the study.
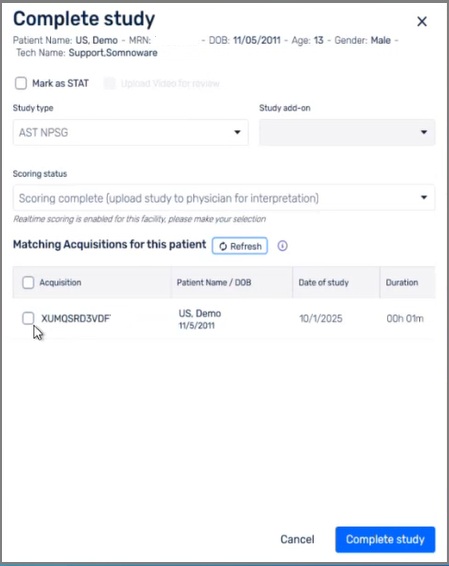
Click Complete study.
The upload progress is displayed.
Follow these steps if you did not enable Use Polysmith Technotes during the local SDI setup.
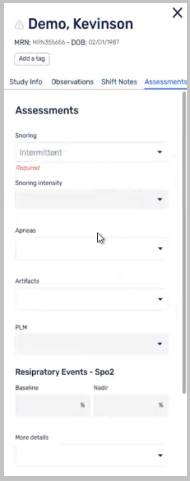
To add tech notes during the study, in the SDI toolbar, click Tech notes.

From the right pane, use the Study Info, Observations, Shift Notes and Assessments tabs to add study details.
Somnoware displays the information you add to the Observations and Assessments tab is displayed in the interpretation report for physicians to view and edit.
Click Ok.
View upload statuses from the SDI and Somnoware.
To view the progress and upload status of a study, in the system tray, click the SDI icon and select In progress.

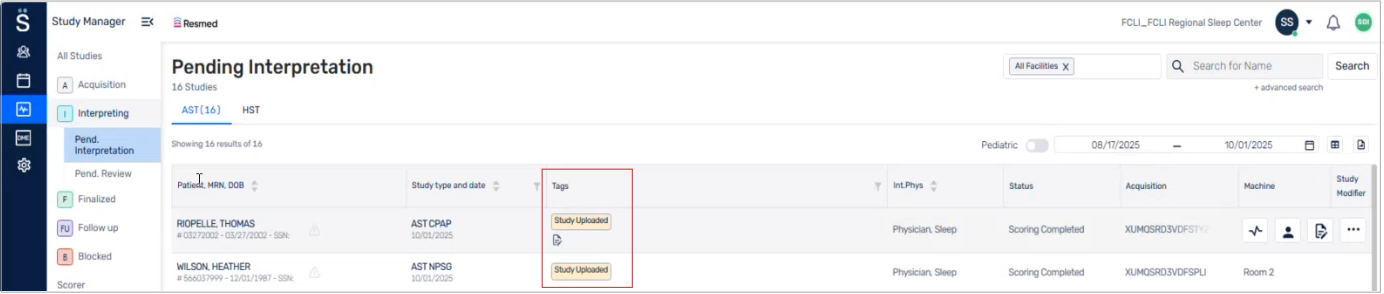
To view the upload status of a study in Somnoware:
Hover over the Manager Module (
 ) and select Study Manager.
From the Study Manager submenu, click Interpreting > Pend. Interpretation.
View the Tags column.
The Study uploaded tag displays after the study is added to the network folder.
Open a sleep study in Polysmith for scoring, then upload the scored study to Somnoware.
Hover over the Manager Module (
) and select Study Manager.Go to Acquisition > Pend. Scoring.
Click the View Tracing icon.
In Polysmith, score the study.
After the study is scored, in Polysmith, go to Reports > Send to EMR, and click Yes to generate the report.
In the Upload study window, click Proceed.
If the Upload study window does not display, do one of the following:
In Somnoware, go to Study Manager > Scorer, hover over the study and click Upload.
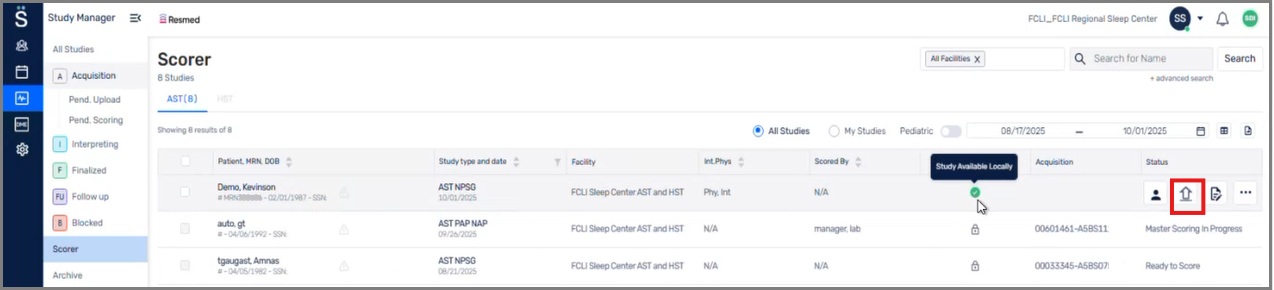
From the Windows taskbar, right-click the SDI icon and select My Sleep Studies. Then click the Actions column next to the patient and click Upload study.
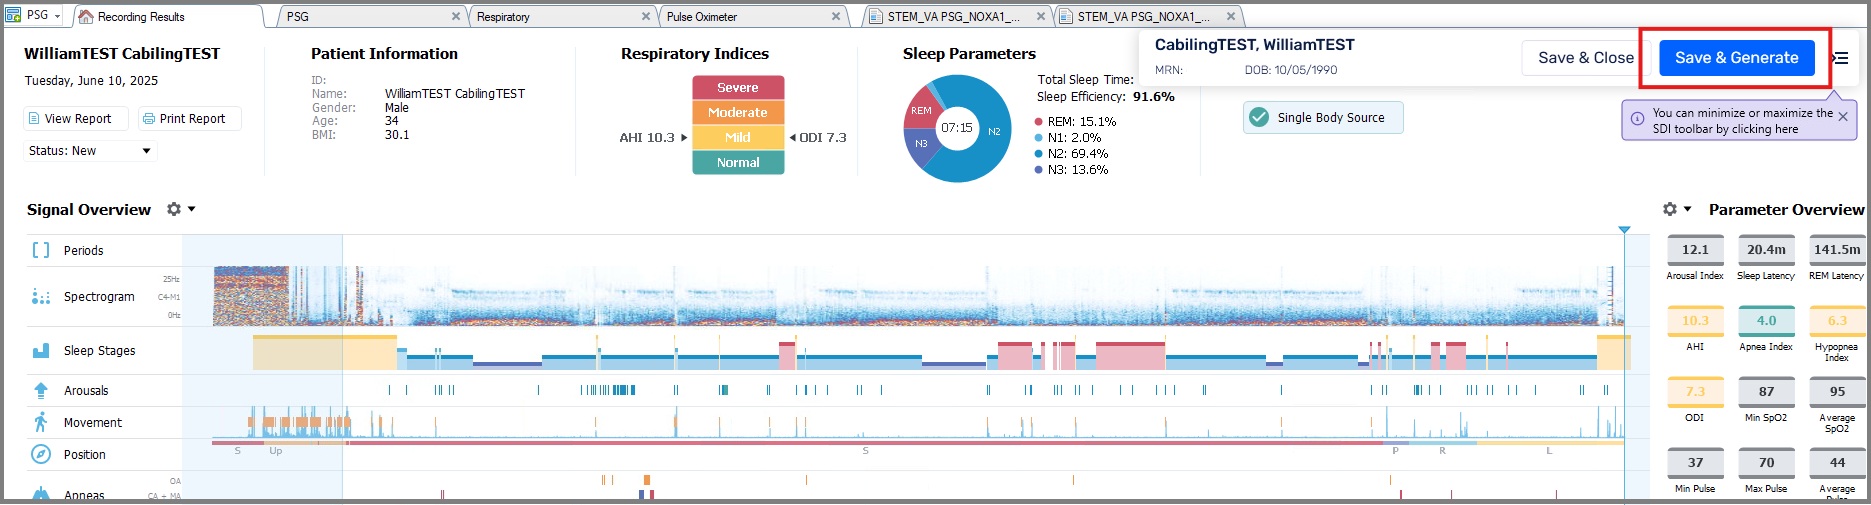
Review, interpret and sign the study.
Hover over the Manager Module (
) and select Physician Manager.Click Interpreting.
(Optional) To review raw study data and score it again:
Click the View Tracing icon.
The study opens in the SDI guided panel.
Once scoring is complete, click Save & Generate.
Note
If the facility uses Somnoware tech notes that are automatically added to the interpretation report, physicians can see and edit the observation and assessments from the tech notes in the report. To access Polysmith and Somnoware tech notes, physicians can click the More icon (
 ) next to the sleep study and select Tech Note.